들어가기 전
Tuist가 프로젝트를 구성하는 여러가지를 swift언어로 미리 구조화하고 그것을 기반으로 프로젝트 파일을
생서하게 도와주는 tool인 것은 이전 시간에 확인했다.
그렇다면 프로젝트를 구성하는 여러가지 개념을 모른다면 Tuist를 사용하지 못한다는 것과 똑같다
이게 Tuist가 러닝커브가 높은 이유 중 하나인 것 같다.
이번 학습은 프로젝트를 구성하는 여러가지 개념을 정리해보자.
Project
tuist 공식 문서를 살펴보면 Xcode proejct를 생성하는 API라고 정의되어있다.
어떤 형태인지 살펴보자.
public struct Project : Codable, Equatable {
	...

        public init(
        // name: 생성되는 xcode 프로젝트 이름
        name: String,
        // organizationName: 조직 이름
        organizationName: String? = nil,
        // options: 프로젝트 옵션
        options: ProjectDescription.Project.Options = .options(),
        // packages: 프로젝트에 사용된 swift package
        packages: [ProjectDescription.Package] = [],
        // settings: 프로젝트 build Setting과 configuration
        settings: ProjectDescription.Settings? = nil,
        // targets: 프로젝트의 타겟
        targets: [ProjectDescription.Target] = [],
        // schemes: 프로젝트의 스킴
        schemes: [ProjectDescription.Scheme] = [],
        // fileHeaderTemplate: custom 파일헤더 = 생성되는 파일 상단에 자동적으로 들어갈 문구 , 보통 저작권
        fileHeaderTemplate: ProjectDescription.FileHeaderTemplate? = nil,
        // additionalFiles: Xcode에서 자동으로 추적하지 않기 때문에 추적이 필요할 파일 목록
        additionalFiles: [ProjectDescription.FileElement] = [],
        // resourceSynthesizers: 여러 확장자들(.jpg,.json,..)의 resource를 프로젝트 생성 시 어떻게 처리해줄 것 인지
        resourceSynthesizers: [ProjectDescription.ResourceSynthesizer] = .default
        )

}
먼저 여기서 간단하게 정리할 수 있는 것 먼저 정리해가보자.
name

- 프로젝트 이름
- String
organizationName

- 조직이름
- String?
- nil일 경우 값이 비어있다.
options
options는 크게 설정한 적이 없어 아직 정확히는 모르지만 공식문서에서는 프로젝트 파일 생성 시 설정할 여러 옵션이며
대표적으로 defaultKnownRegions ["en", "ko"]를 지정하면, 프로젝트는 영어와 한국어 리소스를 포함하도록 설정할 수 있다.
- 기본적으로 default 옵션인 .options()를 쓴다.
- struct Options
 public static func options(
 automaticSchemesOptions: ProjectDescription.Project.Options.AutomaticSchemesOptions = .enabled(),
 defaultKnownRegions: [String]? = nil, developmentRegion: String? = nil,
 disableBundleAccessors: Bool = false,
 disableShowEnvironmentVarsInScriptPhases: Bool = false,
 disableSynthesizedResourceAccessors: Bool = false,
 textSettings: ProjectDescription.Project.Options.TextSettings = .textSettings(),
 xcodeProjectName: String? = nil
 ) -> ProjectDescription.Project.Options
packages
프로젝트에 필요한 패키지에 대한 정보를 명시할 때 사용한다.
- tuist fetch를 해야 패키지를 resolve해 프레임워크로 구성한다. 이후 tuist generate를 해야 dependency가 정상적으로
들어간다.
public enum Package : Equatable, Codable {

	...

    // 깃 (open source)를 이용할 때, 깃 repository url과, 버전이 필요
    case remote(url: String, requirement: ProjectDescription.Package.Requirement)

	// local 패키지를 이용할 때 , path 필요
    case local(path: ProjectDescription.Path)

 }


 extension Package {

    public enum Requirement : Codable, Equatable {

        // 다음 major 버전까지의 범위를 지정하는 경우 (예: from이 1.2.3이면 2.0.0 미만까지 포함)
        case upToNextMajor(from: ProjectDescription.Version)

        // 다음 minor 버전까지의 범위를 지정하는 경우 (예: from이 1.2.3이면 1.3.0 미만까지 포함)
        case upToNextMinor(from: ProjectDescription.Version)

		// 특정 버전 범위(from 버전부터 to 버전 미만까지)를 지정하는 경우
        case range(from: ProjectDescription.Version, to: ProjectDescription.Version)

		// 특정 버전과 정확히 일치하는 버전만을 지정하는 경우
        case exact(ProjectDescription.Version)

		// 특정 브랜치에서 패키지를 가져오도록 지정하는 경우
        case branch(String)

		// 특정 커밋 해시(revision)에서 패키지를 가져오도록 지정하는 경우
        case revision(String)
	}
}
settings

public struct Settings : Equatable, Codable {
	...

   	// base
    public var base: ProjectDescription.SettingsDictionary

	// 적용할 configuration: .debug , .release ... 등
    public var configurations: [ProjectDescription.Configuration]

	// .recommended or .essential
    public var defaultSettings: ProjectDescription.DefaultSettings
}- 위 사진에 들어가는 여러가지 세팅들을 담당하는 객체
- SettingDictionary는 특정 key에대한 value를 넣으면 적용이 되는 것 같다.


대표적으로 왁타버스 뮤직에서는 특정 이벤트 시기마다 아이콘을 바꾸는데 다음과 같이 key에 아이콘 이름에대한 배열을 넣어주면
위와 같이 적용이 잘되는 것을 볼 수 있다.
여기서 중요한 Key 값은 너무 많은 관계로 필요할 때 공식문서를 참고해보자.
fileHeaderTemplate
Xcode를 통해 파일을 새로 만들 때 파일 상단에 들어갈 말 그대로 헤더에 해당된다.
아무것도 설정하지 않으면 다음과 같이 헤더가 설정된다.
//
//  File.swift
//  프로젝트명
//
//  Created by 개발자 on 2023/08/15.
//  Copyright © 2023 누구누구. All rights reserved.
//
additionalFiles
additionalFiles는 Tuist에서 프로젝트를 만들때 Xcode에 자동으로 연결해주지 않는 파일을 넣으면 프로젝트에 연결준다.
예를 들어서 README.md같은 파일은 프로젝트를 만들때 Xcode에는 자동으로 보여지지않는데 여기에 추가해준다면
Xcode에서도 볼 수 있다.
즉, 프로젝트 생성 시 자동추적이 되지 않는 파일 중 추적이 필요한 파일들의 경로를 넣어놓는다.
resourceSynthesizers
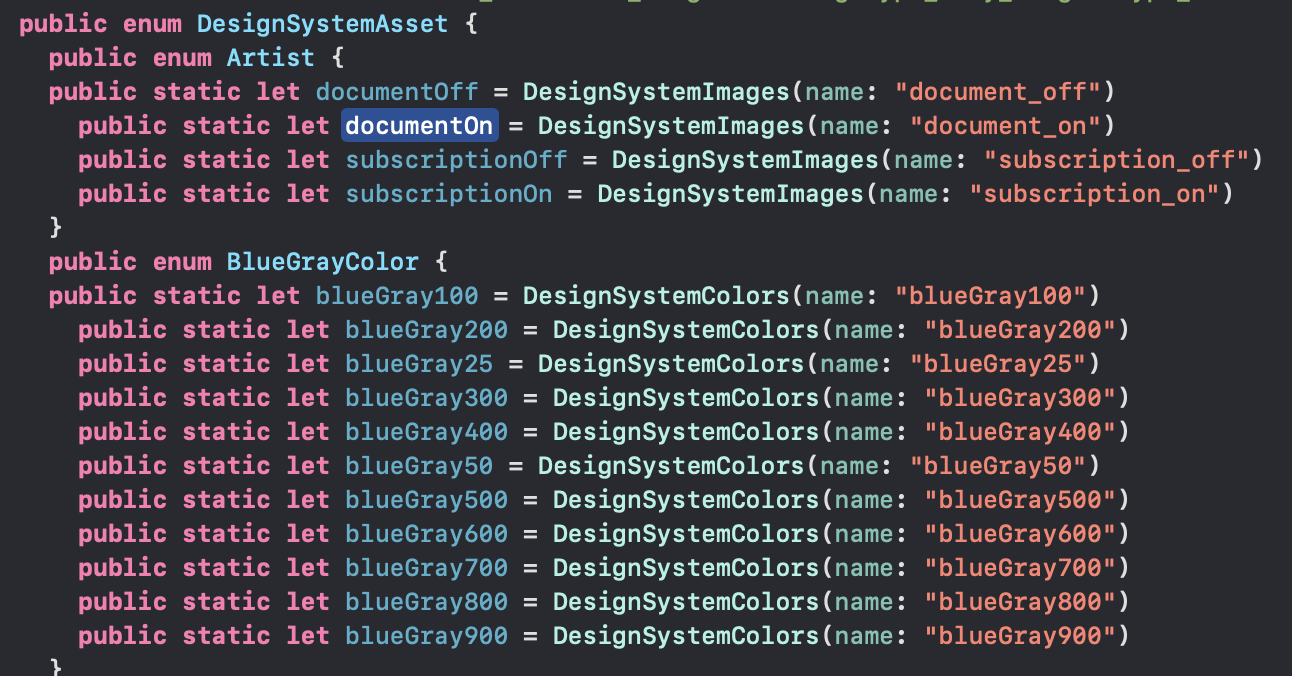
tuist의 또 다른 장점은 프로젝트를 생성할때 Resources/ 안에 파일 확장자에 따라 다음과 같이 enum을 통해
쉽게 접근할 수 있게 제공해준다는 점이다.


이걸 왜 언급하냐 기본적인 strings , plists, fonts, assets은 자동으로 만들어주지만 대표적으로 lottie파일 사용 시
.json은 따로 만들어주지 않는다.
제공해주지 않는 확장자들이 Resources/ 에 들어가 있을때 어떻게 자동 생성해줄지에 대해
.stencil파일로 정의해주면 프로젝트를 생성할 때 .stencil내용에 따라 생성해준다.
json역시 떤식으로 자동 생성 해줄지 .stencil 파일로 미리 넣어 놓는다면 generate 시 stencil에 맞게 생선된다.
Target

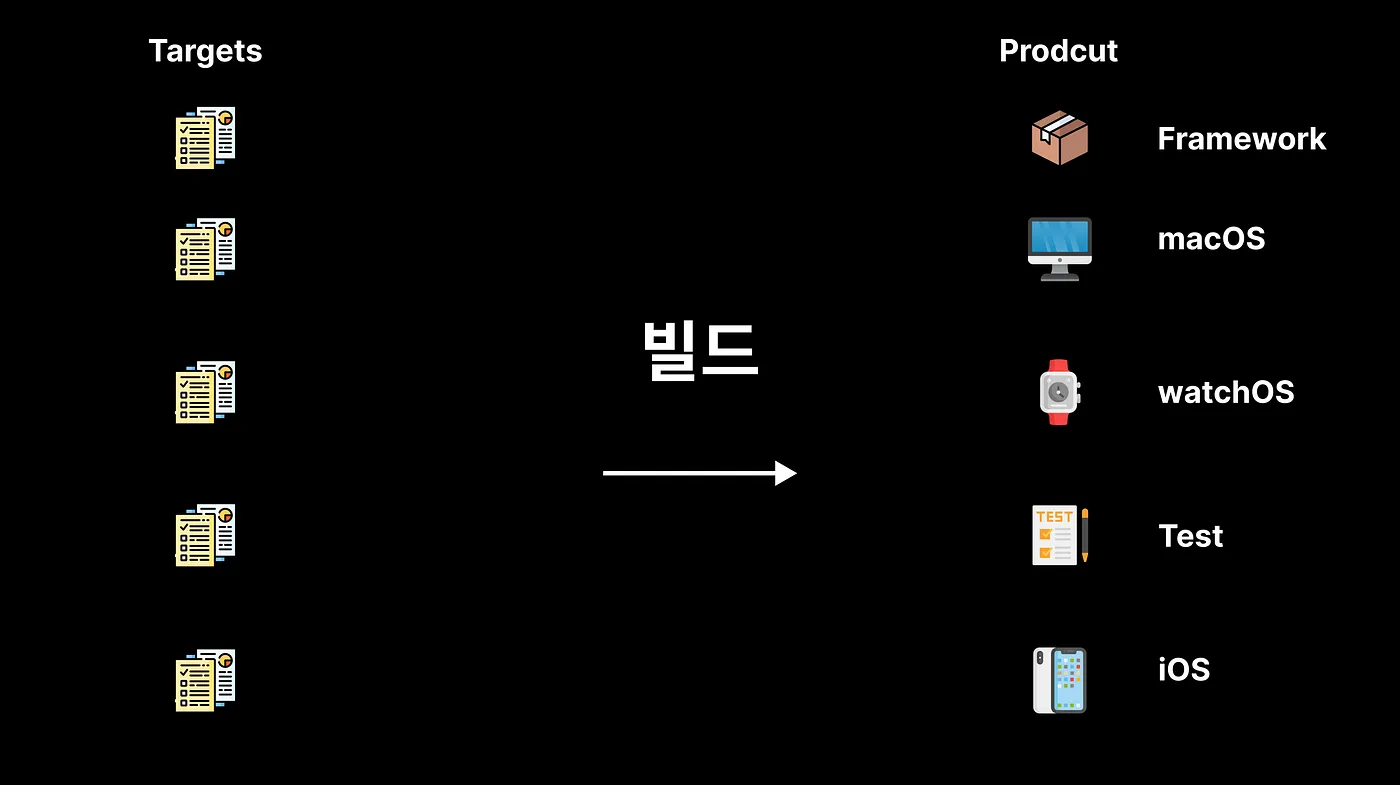
타겟이란 프로젝트 또는 워크스페이스(또는 파일)로부터 프로덕트를 빌드하기위한 여러 가지 지침을 모아 놓은 지침서다.
아래는 타겟이 갖고 있는 프로덕트에 필요한 여러 지침 카테고리다.

- 동시에 활성화 될 수 있는 target은 단 1개다.
- Target의 결과는 하나의 프로덕트를 만들어낸다.
- 여기서 프로덕트는 꼭 하나의 앱이 아닌 framework, Unit Test bundle등 다양한 형태가 될 수 있다.
.target(
    name: // 타겟이름
    destinations: // 지원할 디바이스 배열
    product: // target으로 생성될 product
    bundleId:  // 번들 id
    deploymentTargets: // 각 플랫폼의 최소 버전
    infoPlist: // infoPlist 경로
    sources: // target에 포함되는 소스 코드 경로
    resources: // target에 포함되는 리소스 경로
    entitlements: // target에 필요한 entitlements 경로
    scripts: // target에 동작할 스크립트들
    dependencies: // 타겟에 필요한 의존성
    settings: // 타겟 셋팅
)
더 많은 내용들이 있지만 간단하게 이 정도만 상세하게 정리해보자.
Destinations
지원 디바이스를 명시하는 배열 값
/// A supported deployment destination representation.
public enum Destination : String, Codable, Equatable, CaseIterable {
    case iPhone
    case iPad
    case mac
    case appleWatch
    case appleTv
    case appleVision

    /// macOS support using iPad design
    case macWithiPadDesign

    /// mac Catalyst support
    case macCatalyst

    /// visionOS support using iPad design
    case appleVisionWithiPadDesign
 }
Product
타겟으로 생성될 결과물의 종류를 명시한다.
public enum Product : String, Codable, Equatable {
    /// An application.
    case app
    case staticLibrary
    /// A dynamic library.
    case dynamicLibrary
    /// A dynamic framework.
    case framework
    /// A static framework.
    case staticFramework
    /// A unit tests bundle.
    case unitTests
    /// A UI tests bundle.
    case uiTests
    /// A custom bundle. (currently only iOS resource bundles are supported).
    case bundle
    /// A command line tool (macOS platform only).
    case commandLineTool
    /// An appClip. (iOS platform only).
    case appClip
    /// An application extension.
    case appExtension
    /// A Watch application. (watchOS platform only) .
    case watch2App
    /// A Watch application extension. (watchOS platform only).
    case watch2Extension
    /// A TV Top Shelf Extension.
    case tvTopShelfExtension
    /// An iMessage extension. (iOS platform only)
    case messagesExtension
    /// A sticker pack extension.
    case stickerPackExtension
    /// An XPC. (macOS platform only).
    case xpc
    /// An system extension. (macOS platform only).
    case systemExtension
    /// An ExtensionKit extension.
    case extensionKitExtension
    /// A Swift Macro
    /// Although Apple doesn't officially support Swift Macro Xcode Project targets, we
    /// enable them by adding a command line tool target, a target dependency in
    /// the dependent targets, and the right build settings to use the macro executable.
    case macro
 }
DeploymentTargets
배포타겟을 의미하며 각 플랫폼의 최소 지원 버전을 명시한다.
예시
deploymentTargets: .iOS("15.0")
    public static func multiplatform(
    iOS: String? = nil, macOS: String? = nil,
    watchOS: String? = nil, tvOS: String? = nil,
    visionOS: String? = nil
    ) -> ProjectDescription.DeploymentTargets


    /// Convenience method for `iOS` only minimum version
    public static func iOS(_ version: String) -> ProjectDescription.DeploymentTargets

    /// Convenience method for `macOS` only minimum version
    public static func macOS(_ version: String) -> ProjectDescription.DeploymentTargets

    /// Convenience method for `watchOS` only minimum version
    public static func watchOS(_ version: String) -> ProjectDescription.DeploymentTargets

    /// Convenience method for `tvOS` only minimum version
    public static func tvOS(_ version: String) -> ProjectDescription.DeploymentTargets

    /// Convenience method for `visionOS` only minimum version
    public static func visionOS(_ version: String) -> ProjectDescription.DeploymentTargets
infoPlist
infoPlist를 어떻게 가져올지 명시한다.
public enum InfoPlist : Codable, Equatable {

...

    /// 파일 경로로 가져오기
    case file(path: ProjectDescription.Path)

    /// 매개변수 dictionary를 통해 생성
    case dictionary([String : ProjectDescription.Plist.Value])

    /// .default생성 + 매개변수 dictionary를 합친 상태
    case extendingDefault(with: [String : ProjectDescription.Plist.Value])

    /// 가장 기본적인 plist를 생성
    public static var `default`: ProjectDescription.InfoPlist { get }

}
위 내용들을 적용하면 다음과 같이 쓸 수 있다.
.target(
        name: env.name,
        destinations: [.iPhone],
        product: .app,
        productName: env.name,
        bundleId: "\(env.organizationName).\(env.previousName)",
        deploymentTargets: env.deploymentTargets,
        infoPlist: .file(path: "Support/Info.plist"),
        sources: ["Sources/**"],
        resources: ["Resources/**"],
        entitlements: "Support/\(env.name).entitlements",
        scripts: scripts,
        dependencies: [
   			// .. 의존성
        ],
        settings: .settings(
            base: env.baseSetting,
            configurations: [
                .debug(name: .debug, xcconfig: "XCConfig/Secrets.xcconfig"),
                .debug(name: .qa, xcconfig: "XCConfig/Secrets.xcconfig"),
                .release(name: .release, xcconfig: "XCConfig/Secrets.xcconfig")
            ]
        ),
        environmentVariables: ["NETWORK_LOG_LEVEL": "short"]
Scheme
앱을 빌드할 때 실행할 미리 정의해 놓은 설정들의 집합으로 다음과 같은 구성요소가 있다.
- 빌드될 타겟
- 사용할 configuration
- 테스트 환경
특징은 다음과 같다.
- 한 프로젝트에 여러개의 스킴을 가질 수 있다.
- 단, 활성화는 1개만 가능하다.
- Xcode Product -> Scheme -> Manage -> Schemes 에서 확인 가능
    ///   - name: 스킴의 이름입니다. 이 이름으로 Xcode에서 스킴이 표시됩니다.
    ///   - shared: 스킴이 공유 여부를 나타냅니다. true이면 이 스킴이 Xcode의 공유 스킴으로 설정됩니다.
    ///   - hidden: 스킴을 Xcode 드롭다운의 스킴 목록에서 숨길지 여부를 나타냅니다. true이면 숨겨집니다.
    ///   - buildAction: 프로젝트 타겟을 빌드하는 액션입니다. 여기서 빌드 설정을 지정할 수 있습니다.
    ///   - testAction: 프로젝트 테스트를 실행하는 액션입니다. 테스트 설정 및 실행 대상을 지정할 수 있습니다.
    ///   - runAction: 빌드된 프로젝트 제품을 실행하는 액션입니다. 실행 시 시뮬레이터, 디바이스, 환경 설정 등을 지정할 수 있습니다.
    ///   - archiveAction: 프로젝트 아카이브를 수행하는 액션입니다. 아카이빙 옵션 및 환경설정을 정의할 수 있습니다.
    ///   - profileAction: 프로젝트 성능을 프로파일링할 때 사용되는 액션입니다. 프로파일링 도구 및 설정을 지정할 수 있습니다.
    ///   - analyzeAction: 프로젝트 분석을 수행하는 액션입니다. 코드 분석을 통해 잠재적 문제를 찾는 데 사용됩니다.
    public static func scheme(
    name: String,
    shared: Bool = true,
    hidden: Bool = false,
    buildAction: ProjectDescription.BuildAction? = nil,
    testAction: ProjectDescription.TestAction? = nil,
    runAction: ProjectDescription.RunAction? = nil,
    archiveAction: ProjectDescription.ArchiveAction? = nil,
    profileAction: ProjectDescription.ProfileAction? = nil,
    analyzeAction: ProjectDescription.AnalyzeAction? = nil
    )
WorkSpace
워크스페이스는 Xcode Projects그룹으로 묶은 객체이며 다수의 Xcode Projects를 포함할수 있다.
init(
name: String, // 워크 스페이스이름
projects: [ProjectDescription.Path], // 그룹으로 묶을 프로젝트 경로
schemes: [ProjectDescription.Scheme] = [], // 사용할 스킴
fileHeaderTemplate: ProjectDescription.FileHeaderTemplate? = nil, // 파일 헤더
additionalFiles: [ProjectDescription.FileElement] = [], // 워크스페이스 생성 시 추적할 파일
generationOptions: ProjectDescription.Workspace.GenerationOptions = .options() // 워크스페이스 생성 옵션
)

참고
What is Tuist? | Tuist
docs.tuist.io
Tuist 사용법 - 1. 이론 및 샘플 예제
Tuist? Xcode 프로젝트 관리 툴? Why Tuist? 설치 Manifests Project.swift Workspace.swift Config.swift Target 샘플 프로젝트 모듈 생성 Method 모듈 구조 만들기 결론 Tuist? Xcode 프로젝트를 관리하는 툴입니다. Project.swif
baegteun.tistory.com
Build settings reference | Apple Developer Documentation
A detailed list of individual Xcode build settings that control or change the way a target is built.
developer.apple.com
Documentation
tuist.github.io
iOS 프로젝트 구성요소
프로젝트 구성요소
blog.wakmusic.xyz
'iOS > Tuist' 카테고리의 다른 글
| [부스트 캠프] Tuist와 불편한 동거 (4) | 2024.11.26 |
|---|---|
| Tuist 탬플릿 만들기 (1) Make File (0) | 2024.11.09 |
| Tuist 구성 파일 (0) | 2024.11.03 |
| Framework vs Library (3) | 2024.11.03 |
| Tuist란? (1) | 2024.11.02 |